Showing posts with label cooking. Show all posts

Thursday, January 2, 2014

Delish veggie burger

I am always on the hunt for a yummy veggie burger.  Eating the same same all the time gets more than a little boring for me.  As a grad student veggie burgers on the cheap are always an A+.  That means the staples for the burger will be beans, something that I eat o'plenty.  This recipe uses chickpeas and red lentils.  I really threw in what I had left in the fridge, hence the 1/4 sweet potato (leftover from breakfast)

I don't remember where I adopted this recipe from, but there are a ton of chickpea & lentils in the land of internet.

I am estimating the measurements below, you can add or subtract for your taste preference. 

You can use can or dried chickpeas.  I used dried, well because they are cheaper and I can flavor them as they cook. 

Makes about 8 palm size burgers

1 1/2c. Cooked chickpeas
1 c. Dried lentils (not sure how much this is cooked)
1 sm onion
2 carrots
1/4 sweet potato
1 c oats
Cumin
Salt & pepper
1 Tbsp Tahini
Cilantro
Garlic
1 egg
Olive oil

Cook the lentils.  As the cook sautee the onion, carrot, and garlic until the onions are tender.  Season with cumin, salt, & pepper.

Grind oats into flour in a food processor.  Dump into a bowl. 

Grind chickpeas, onion mixture, tahini, cilantro, and egg in food processor.  Dump in a bowl.

Grind sweet potato in food processor.  Dump in bowl.

Add lentils to bowl (this is the same bowl with all of your other ingredients).  This is where you get dirty...mix everything with your hands.  Add more oats as needed.

You want the mixture to be moist, but not soggy. 

Form into patties, lay on wax paper and stick in the fridge for about 1/2 hr - 1 hr. 

Heat a bit of olive oil in a pan and brown patties on each side.

Serve with your favorite toppings.  And yes tator tots are okay! I am a fan of spinach and avocado! 

Noms noms!

What do you add to your veggie burger?

Sunday, February 19, 2012

New Kitchen Labels

I like to store most of my dry goods in a variety of glass jars.  Boxes and plastic bags hanging out in my kitchen looks sloppy and drives me nuts.  The issue I have had with the jars is there weren't any labels on them.  So I would cut out part of the bag or box and shove it into the jar so I would remember what in the world was in there. 
 Then there would be the jars that I didn't put anything in it, so who knows what's in there.  Something white, something resembling flour.  Smells like...bad flour.  So it gets chucked. 
 I have some chalkboard paint laying around and tossed around the idea of painting a circle so I could write on it. But I have these great vintage jars in my stash and didn't want paint on them.  Plus, I was worried I would change my mind on how I wanted to label the jars and if I didn't like the chalkboard thing anymore....I'd be stuck.  No bueno. 
I found these  great labels at Staples. They are actually part of the new Martha Stewart collection; I normally don't support Martha Stewart, for reason I just won't go into. But these labels were too cute and they are removable (so if I change my mind, I'm out the $4 I spent on them).  I would recommend putting the label, then writing on it with  chalk.  I found that using a towel to press the label flat worked best, but if chalk is already on it then you wipe it off.  I do need to get some smaller labels for the shorter jars I have, the larger labels just aren't working.  

I just love the way they look!  


Monday, January 24, 2011

Yummy fish goodness

I have this horrible habit of not planning my meals ahead of time.  As a result, when I go to the market I buy what looks good or I'll decide at home that I just have to have chili, so I'll run out right then and buy the ingredients needed.  This year, I decided to set intentions for the week rather than the entire year, and this week my intention was to reorganize my kitchen and plan out meals for the next week - and I did!!

This afternoon I got down some of those cookbooks and picked out some scrumptious recipes to make.  Tonight for dinner I made Balti Fish Fillets in Spicy Coconut Sauce and let me tell you it was beyond delish.  I bought an Indian cookbook several years ago and usually make the same recipes over and over, so I decided to try a new one.  I've included the recipe below of you, I don't have step by step pictures because the screen on my camera is cracked and it takes about 10 tries for me to get a nice picture now.


What you will need:

2 tbsp corn oil (Olive oil or Canola Oil will also work)
1 Tbsp Onion seeds  (I omitted the seeds because I didn't have any)
4 dried red chilis  (adjust for your preference of spicy, I only chopped up 1/2 chili)
3 garlic cloves, sliced
1 MD onion, sliced
2 MD tomatoes, sliced (us your favorite tomato)
2 Tbsp shredded coconut (I used about 1/3 cup)
1 tsp salt
1 tsp ground coriander
4 fish fillets (Sole, Flounder, or Plaice)
2/3 C. water
1 Tbsp lime juice
1 Tbsp Chopped Cilantro

Step one:
Heat the oil in a hot skillet.
Lower the heat and add the following cooking for 3-minutes
  • Garlic
  • Onion Seed 
  • Chili
  • Onion

Add:
  • Tomatos
  • Coconut
  • Salt
  • Coriander 
  • Lime juice 
Add Fish pieces and cook for 5-7 minutes
Add:
  • Water
  • Cilantro
Cook for 5 minutes more until water has evaporated.
Serve with rice and enjoy!

Wednesday, January 19, 2011

Adventures of a first time canner

About 10 years ago, I decided to cut back on the amout of eat I was eating after I became educated on how much energy went into bring that chicken or that pork to my table.  I started buying meat  from local farmers, but if you live in NYC then you know how expense shopping at the Union Square Farmers Market can be.  When I moved from NYC to Louisville, I had joined Americorps and was completely broke, so buying organic meat from local farmers was out of the question, so I stopped eating meat. 

In recent years, I have started embracing the local movement: buying from local stores, artists, eating at local restaurants, and of course farmer's markets (I never stopped buying my veggies from  them).   I have the secret dream to homestead: raise chickens, have sheep, spend my days making pie, running through fields of wildflowers, and sewing; in Maine, I want all this to happen in Maine.

This past winter as the last of the farmers sold their squashes and I went to the grocery store, I was depressed at the state of my choices in "fresh" produce.  I don't know why the sad state of the lettuce and tomatoes didn't affect me as much in previous years, but this year I was in horror  of the produce they were selling. 

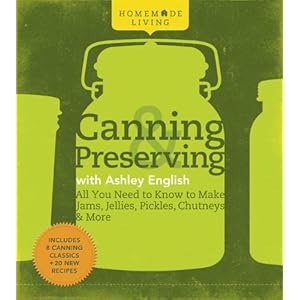
I decided several weeks ago I wanted to start canning and preserving my delish veggies this summer and wanted to practice before the first harvest.  I'd been researching books and decided to purchase "Canning & Preserving" by Ashley English.  I love how pretty the pages are to look at, I am a stickler for pictures in any sort of book that has to do with food.  If there are not pictures, I am not interested in   to cook from it.  This book is not only loaded with pictures, but it's easy to follow.  Ashley makes canning sound so easy that even I could do it.  I told a friend today I had decided to start canning, and he asked what had I made so far.  Despite my enthusiam for wanting to can, I haven't actually done it yet; I am trying to take the sensible approach and read everything before I dive in, elimiating a huge screw up. I've heard a lot of tales about how if you can something the wrong way you can get poisoned, which just confuses me because our grandmothers canned all the time.  So, I would like to find out, how exactly could I get poisoned, do you know?

Do you can? I'd love to hear your feedback, do you find it enjoyable?

Stay tuned for more adventures in canning!

Sunday, January 2, 2011

Yummy soup on a cold day

During the winter months I love cooking up a large pot of chili, soup, or a stew.  Something about the cold weather makes me want to eat soup, do you get like that?  Today I made a pot of spicy pumpkin soup. There are several ways you can make this depending on what you have in your pantry, I am low on groceries so I made it the super quick way! This is a great soup for people on the go to make and it's really healthy, loaded with lots of vitamins.  I've included the basic recipe below, I have to warn you when I make soup, I really don't measure, I just eyeball everything to taste. 
Heat your pot up and after it's hot, pour in a little olive or canola oil. Once the oil is hot, put in some onions to sweat.  I didn't have fresh onions (like I said, low on the groceries), so I used frozen.  I keep frozen onions on hand and they work out perfect, plus your eyes don't water up like when you cut fresh onions.  Once the onions sweat out, throw in some corn and your seasonings.  
Like I said I season to taste and for this recipe I used 1 clove of garlic, salt, pepper, ground cumin and chili powder.  I wouldn't use more than about 1 teaspoon of the chili powder and cumin, unless you are making a really big pot. Now your pot should start smelling really yummy.  
 
Next you are going to add 1 can of pumpkin puree, 1 can of black beans, about a cup of salsa, and about a cup of sour cream.  I normally cook dry beans and would use fresh pumpkin, but if you are short on time or don't have the patience to cook dry beans, canned works  great! I like to use garden salsa, but any kind you have would also work great.  Mango salsa would give the soup a  bit of a sweet taste.  

At this point your soup is almost done, just bring everything to a boil, then dish into your favorite bowl and top it off with some cherry tomatoes, sour cream, croutons, or all three!  Let me know if you come up with other things to add to your version.

Tuesday, December 21, 2010

My passionate love affair with Farro


Several months ago I bought a bag of Farro, curious as to what it was, but it looked delicious.  The bag actually sat unopened in my kitchen for a month or two, then one day when I had nothing else to eat, I remembered Farro.  Had I known how delicous Farro  was, I would have opened it the day I bought it.  If you don't know what Farro, also called Emmr Wheat, has a very close reltionship to Spelt.  It is thought to have been first domesticated in Turkey, but is now widely grown in Europe especially in Italy.  Farro is low in  calories and fat, but high in fiber.

Farro has a slightly nutty, chewy texture and can be used in sweet or savory dishes.  My new favorite breakfast food is Farro and blueberries.  

In it's uncooked form, it almost looks like large pieces of brown rice.  Wash the Farro off, and add 1 Cup Farro to 2 cups water in a saucepan. 
Bring to a  boil, then let lower the heat and let it cook for about 15 - 20 minutes, careful not to let the water evoporate and burn the Farro (not that I've ever done that).

Add a couple of tablespoons maple syrup and some walnuts (hazelnuts, almonds will also work).

Scoop into your favorite bowl, top with some blueberries and enjoy! Fresh blueberries are best, but hard to come by in Kentucky in December so I used frozen. 
This would also be delish with strawberries, peaches or pears.  Let me know which of your favorite fruits you add to this.  What's your favorite Farro recipe?